It was just an ordinary Wednesday afternoon. I'd been making a few Christmas cards, and watching Jean Hardy's Facebook Live on the Crafty Individuals Facebook Page, when my phone pinged. It was a message from Jean, asking me if I would like to join the Crafty Individuals Design Team! It took a few seconds to sink in. What? Who, me?? Really?? Then the excitement set in! Wow! Crafty Individuals was one of the first British stamp companies I bought from, many years ago, and they have always been right up at the top of my list of favourites! To be on their DT would be a dream come true! I was so excited! I thought I'd better ask Jean for some time to think about it, because I didn't want to make a commitment unless I was sure I could fulfil it. Jean said that was fine, so I had a think, and about 5 seconds later messaged her back to say yes please! Did I say I was excited?!!
The next development was the arrival of a parcel of the newest stamps and papers! They are all fabulous (you can find them here) and I was so excited to get to play with them. Did I say I was excited?!!
Here are some of my first makes as a DT member! My favourite of the new stamps, which have all been designed by Sharron Bates, is the wonderful
"Of The Sea" (CI-559), which is an old boat with a lovely vintage feel. I thought it would make a suitable subject for pyrography.
I stamped the image with Memento Desert Sand ink on to Cass Art 300gsm hot press watercolour card, a good strong card with the ability to take the heat of the pyrography tool. I then used the tool to outline and shade the image. I overstamped one of the papers from the new
"Wonderfully Weathered" Set 1 with some text from CI-397 before mounting the image over the paper. I added a few elements from CI-397, CI-272 and CI-349 to complete the project, which is a free standing plaque. Here's a close up of the lovely old boat.
My next play was with the gorgeous
"Flower" CI-560, Sharron's stunning interpretation of a cone flower (aka Echinacea). I decided to make a journal.
I made front and back covers from mountboard and covered the outside of them with papers from the
"Aurora Borealis" A4 background paper set and the insides with one of the designs from a brand new paper set
"Vintage Style Journaling Papers". The pages are a mixture of watercolour card and black cartridge paper, as you can just about see in the next photo. The covers and papers were bound together with my Bind-It-All machine.
Next, the flower was stamped on to encaustic art card, clear embossed, watercoloured and covered with Ranger Glossy Accents to seal it. Then alcohol inks were sponged over to make a background. An aperture was cut from a piece of textured card with a die from The Works, the image affixed behind it and then matted on to contrasting card to frame it. This was then adhered to the front of the journal, along with a book plate holder which has been in my stash for years! The wording inside it was computer generated.
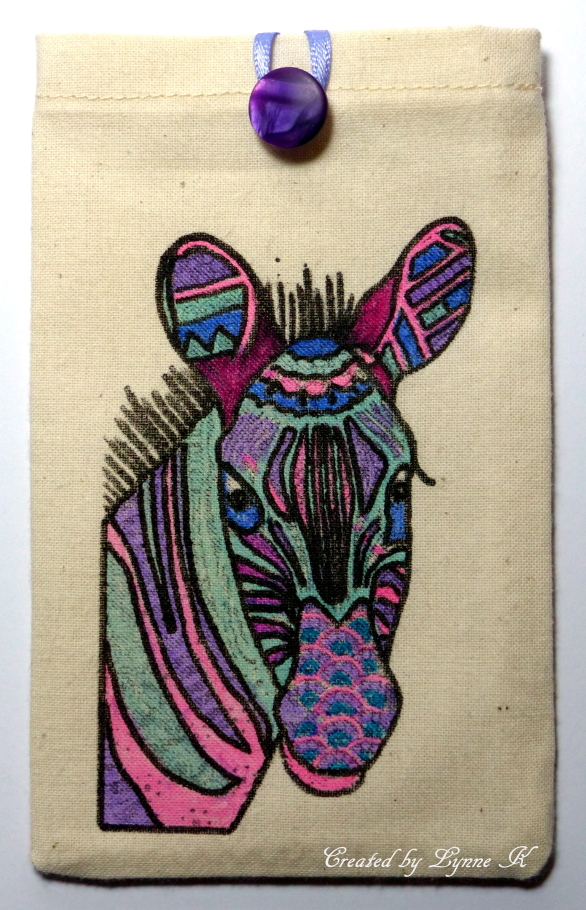
My final show-and-tell for now is the utterly fabulous
"Pablo the Penguin" CI-557! I had finished all my Christmas cards, so I made a gift bag instead and put him on that.
I stamped Pablo, various elements from CI-257 and CI-326 and the snowflake (which I think was a freebie) onto fabric with Versacraft ink, which I heat set, and then added colour with Arteza fabric pens, which also needed to be heat set. I fringed the edges of the panel and stitched it to the front of the bag. I was quite happy with the result, but felt it needed just a little something else to finish it off. Had a rummage through my stash and found some tiny bells, which I attached to his antlers. Perfect!
Here he is in all his glory!
I've loved working with these fantastic stamps, and have more ideas for future projects, so thanks for looking, and watch this space!


